Latte art has become a beloved practice for coffee enthusiasts, adding an artistic touch to a simple cup of coffee. If you want to impress your friends or customers with stunning latte designs, mastering the technique of pouring latte art is essential. This guide will walk you through the key elements needed to create beautiful latte art, from brewing the perfect espresso to mastering the pour.
Espresso and Milk Frothing
Creating beautiful latte art starts with the foundation of a good espresso and well-frothed milk. Here’s how you can perfect both:
The Importance of a Quality Espresso Machine
A good espresso machine is crucial for achieving the ideal base for latte art. Machines like the Expobar Brewtus are popular among specialty baristas for their ability to pull consistent shots of espresso. A reliable machine ensures your espresso has the right amount of crema, which is vital for visible latte art. Investing in a quality coffee machine is worth it for any serious coffee artist.
Achieving the Perfect Espresso Shot
To make a great espresso shot, use fresh coffee beans and a burr grinder to grind them just before brewing. The Espobar Brewtus or a stovetop moka pot will both work well for brewing. The key is to pull a shot with a rich crema on top. This will give your milk the ideal surface to create stunning designs. The espresso should have a smooth texture, with a balanced flavor profile, neither too bitter nor too acidic.
Selecting the Right Milk and Frothing Techniques
Milk plays a major role in creating the perfect canvas for latte art. Understanding milk texture and frothing methods is crucial for producing a silky smooth surface.
Essential Tools for Latte Art
To properly froth milk, you’ll need a steaming pitcher, milk jug, and a steam wand. A pitcher spout helps in precision pouring and shaping the design. Whether you’re making milk drinks for home or a café setting, having the right tools ensures consistent results.
Types of Milk Frothers
Milk frothing tools come in several types, including manual steam wands and electric milk frothers. A steam wand, commonly found on coffee machines, is the preferred tool for creating microfoam – the velvety texture that’s essential for latte art. Alternative milks, such as oat, almond, or soy milk, can also be frothed, though some may not froth as easily as whole milk or skimmed milk.
Recommended Pitchers for Pouring
A good milk pitcher should have a tapered design, with a well-angled spout to control the flow of milk. This allows you to create precise patterns. A sturdy, heat-resistant pitcher ensures comfort and safety while working with hot milk. Always aim for a steaming pitcher that fits comfortably in your hand for better control.
Basic Latte Art Patterns
Once you have your espresso shot and milk ready, it’s time to start pouring. There are several basic patterns that every latte artist should learn.
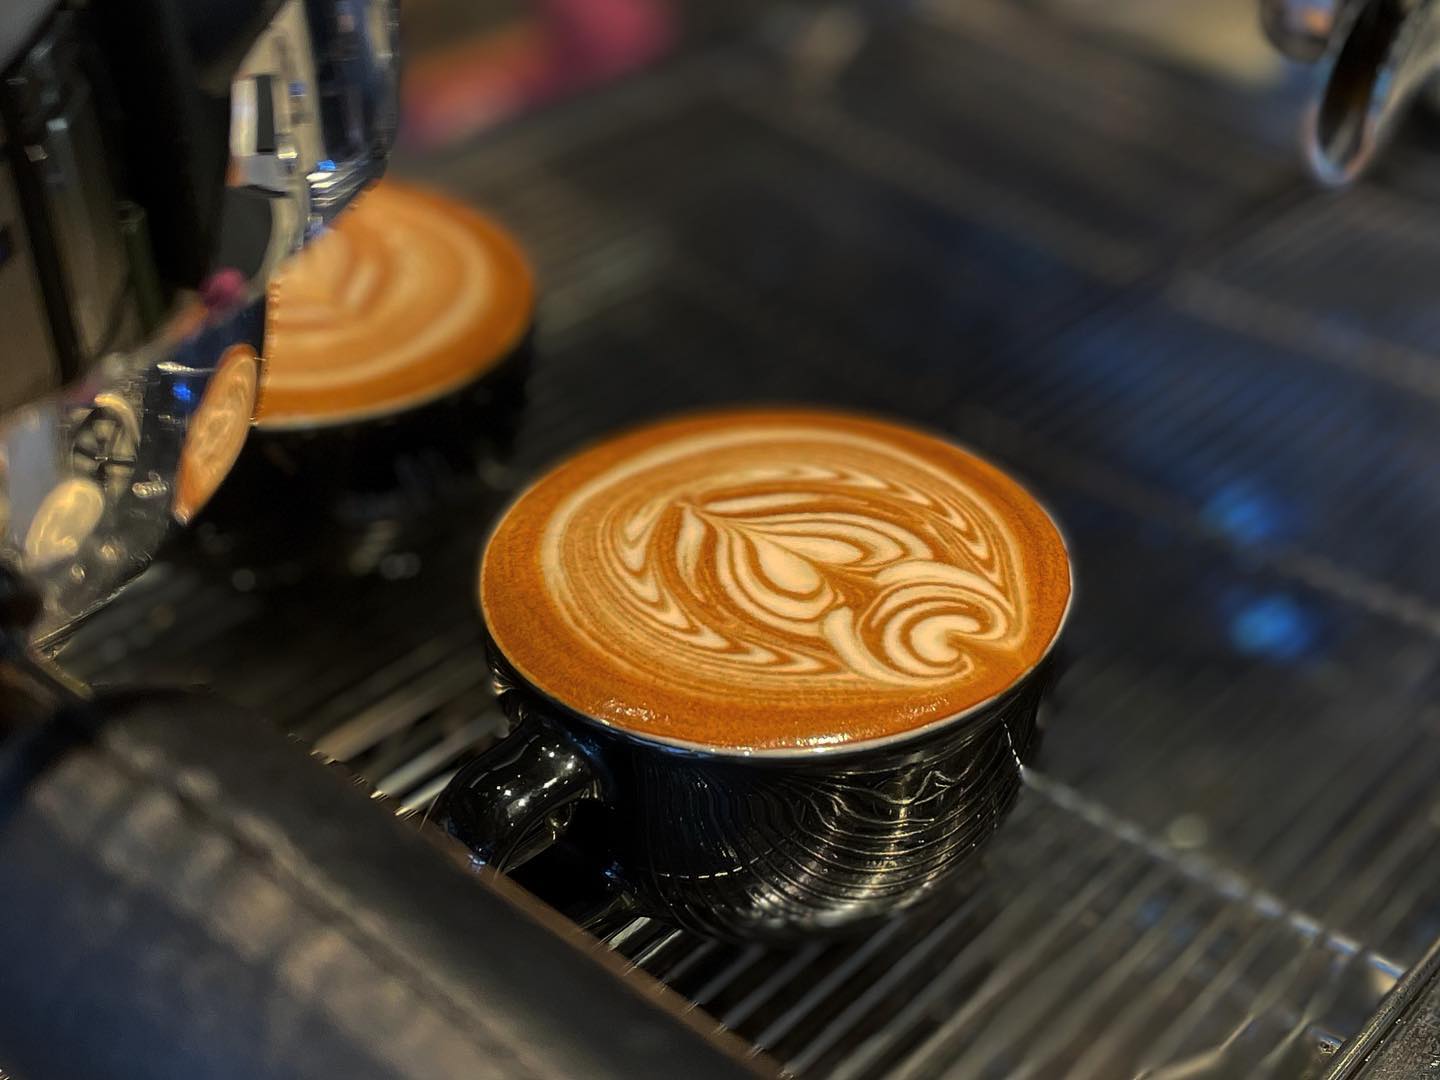
Creating a Heart Design
The heart is one of the simplest and most popular latte art designs. To create it, start by pouring the microfoamed milk into the center of the espresso. As you pour, tilt your cup and move the pitcher closer to the surface. Once the milk forms a white circle, use your pitcher’s spout to draw a simple heart by gently swirling.
Mastering the Tulip Pattern
The tulip pattern is created by layering several hearts on top of each other. Start by pouring a small heart, then continue to pour two more hearts on top, overlapping them slightly. As you reach the top of the cup, gently finish the design by pulling a stem shape through the center.
Crafting a Rosetta Design
The rosetta is a more intricate design resembling a leaf. Start by pouring the textured steamed milk slowly into the espresso, then rapidly move the milk pitcher back and forth, creating a leaf pattern. Finish the design with a sharp pull through the center, forming the stem.
Advanced Techniques for Complex Designs
As you become more proficient at basic designs, you can experiment with more advanced techniques.
Layering Multiple Patterns
You can layer different patterns, like combining a flower design with a leaf latte art pattern for a more intricate visual effect. Layering designs takes practice but adds a new level of artistry to your latte pours.
Incorporating Colors into Latte Art
For a more creative flair, consider incorporating cocoa powder, matcha, or even food-safe colored powders into your designs. You can gently tap these onto the surface of your latte to create colored art on top of your microfoamed milk.
Pouring Techniques and Tips
Perfecting your pouring technique is key to achieving beautiful latte art. Here are a few tips:
The Correct Pouring Angle
The angle at which you pour milk into your espresso matters. A 45-degree angle is ideal for controlling the flow of milk and allowing the microfoam to interact with the espresso’s crema. As you pour, gradually straighten the cup to allow the milk to rise up to the top.
Controlling Pouring Speed
The speed at which you pour your milk impacts the final design. For more intricate patterns, a slow, controlled pour is necessary. A faster pour will result in larger designs, like hearts and tulips, but may make more complex patterns harder to control.
Practicing for Perfection
Like any skill, pouring latte art requires practice. Spend time experimenting with different pouring speeds, milk temperatures, and patterns. The more you practice, the more consistent and precise your latte art will become.
Overcoming Common Mistakes
When practicing, it’s common to encounter some challenges. Here are a few common mistakes and how to avoid them:
- Residual Bubbles: Ensure that your milk is frothed to the right texture to avoid large bubbles that disrupt the smooth surface needed for art.
- Milk Temperature: The ideal milk temperature for latte art is between 150–160°F (65–70°C). Overheating the milk will cause the texture to break down, making it difficult to pour beautiful designs.
Maintaining Consistent Art Quality
Creating consistent quality in your latte art can be tricky. Keep the following in mind:
- Always use fresh coffee beans and freshly ground coffee for the best crema.
- Maintain your espresso machine and steam wand to avoid inconsistent shots and frothing.
- Regularly clean your milk frother and pitcher spout to ensure smooth milk frothing.
Expert Tips and Guidance
To further enhance your latte art skills, consider the following advice from professional baristas:
Learning from Barista Tutorials
Watch online tutorials by expert latte artists to learn new techniques and improve your skills. Platforms like Stack Overflow and Q&A communities offer great insights from seasoned coffee makers.
Engaging with Latte Art Communities
Joining a latte art community can provide invaluable feedback. You can learn new tips, tricks, and techniques from other artists and get advice on how to improve your craft.
Enhancing the Latte Art Experience
Beyond the art of pouring, presentation is key to elevating the experience. Whether serving a coffee mug at home or a cup tray at a café, make sure your presentation complements your artwork.
Capturing and Sharing Your Art
Don’t forget to take photos of your beautiful creations. Sharing your latte art on social media is a great way to showcase your talent, engage with other coffee lovers, and even learn new techniques from others.
With patience and practice, you’ll soon be creating intricate and beautiful designs like a true latte artist. From milk temperature to pouring angle, every detail plays a part in creating stunning coffee art. So grab your steaming milk, perfect your pouring techniques, and get ready to pour your way to perfection!
FAQ’s on Make Latte Art
Whole milk is ideal for creating smooth microfoam, which is crucial for latte art. Skimmed milk and alternative milks like oat or almond can also work but may not froth as easily.
Use a steam wand on your coffee machine to froth textured steamed milk. Aim for a milk temperature of around 150–160°F for the perfect milk texture and microfoam.
You’ll need a milk pitcher, a steaming pitcher, and a pitcher spout for precision pouring. These tools help create smooth, controlled patterns like heart or leaf latte art.
Start by pouring microfoamed milk into the center of your espresso, then slowly move the pitcher and pull through the center to form a heart shape.
For the best latte art, it’s recommended to use freshly brewed espresso from coffee beans ground with a burr grinder. Instant coffee won’t create the same quality crema needed for intricate designs.